
SelfGuide chat
Welkom bij SelfGuide!
Heb je een vraag? Stel deze dan aan een van onze collega's en meestal heb je binnen 24 uur antwoord.
Wil je meteen antwoord op je vraag? Kijk eens op onderstaande pagina's.
?

The IT landscape is developing fast and for a lot of applications, it's quite common that the user has a choice from which device the application is used. Based on the moment and the need, sometimes the user will choose for a computer, other times for a tablet or even a phone. Due too this kind of usage, there is a need for Instructions showing application usage on an iPad.
The contents of an Instruction is created using the SelfGuide Recorder. The recorder is only available on Windows but there is an option to create an Instruction for another type of device using the recorder on Windows. Follow the steps below to learn how to create an Instruction for an iPad.
For each step in the Instruction, a screenshot is required which must be made on the iPad. Perform the actions on the iPad one by one and before going to the next action, create a screenshot. For example, fill in a form and create a screenshot before pressing the Send button.
To create a screenshot on the iPad, several methods are available. The two most common methods:
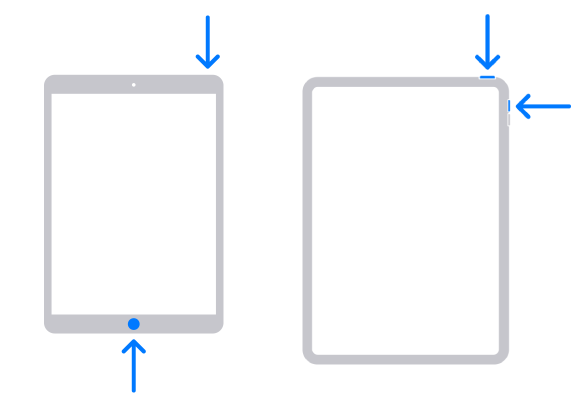
See the iPad user manual for more information
All taken screenshots need to be transferred to the computer where the SelfGuide Recorder is installed. Several options are available to transform the screenshots, for example:
To create the recording based on the screenshots, the Slideshow functionality in Windows will be used. Follow the steps below to prepare the recording:

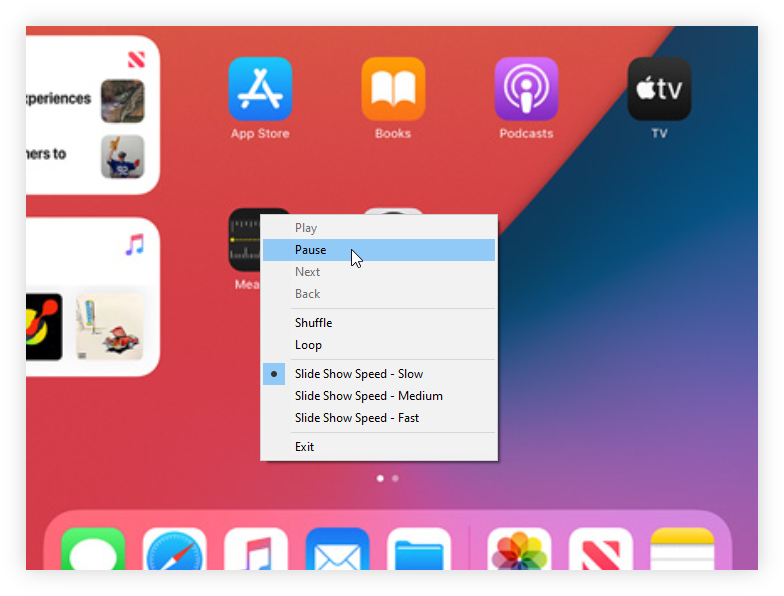
The slideshow is prepared, on each click the next slide will be opened
With the slideshow ready, the recording can be made:
Now the recording is made, the Instruction contains steps and can be finished. Verify for each step if the crosshair is on the right spot, add censor areas for sensitive information, add annotation for additional information and add titles to the steps.


